
DIY Graphic T-shirt
1:07 PM
Hey guys! I'm starting the new year off with a bang. I've been slacking on the blog since Carter was born, but I'm back! My plan is to have a handmade wardrobe for him and me and document the process via the blog or YouTube videos. Today, I'll be sewing a basic t-shirt, but I added a graphic/saying on his. My son is still in toddler clothing and this book Kwik Sew: Sewing for Toddlers is dedicated to small kids like Carter.
Anyway let's get started....

- Coordinating thread
- Scissors
- 1/2 yd of knit fabric (but you can get 5/8 yd depending on the child's size)
- 3/8 yd of ribbed knit
- Tracing paper ( you have to trace the master patterns in the back of the book)
- Pattern paper ( I had kraft paper *get it here*)
- Tailors Chalk *get here*
- Hem gauge
- Ball point pins
- Iron and ironing board
- Transfer paper (only if your doing the graphic)
- Sewing machine
- Rulers
- Cutting Mat

This is the shirt pattern I used from the book. Pretty simple and basic but I just added my own twist with the contrasting collar and cuffs.

This is the master pattern. It has all the patterns, but the only downside is you have to trace the pattern because all the patterns are printed on that one page so you can't just cut the pattern out without risking cutting another piece of the patter.

Here, I laid out my fabric and folded it to try and save space for everything. The stretch is going across so be sure to pay attention to your grainline vs the stretch of the fabric. I laid everything out and cut out the front and back on fold, then the sleeves I cut out without the fold.

For the ribbed knit part I cut out the neckband, cuff and sleeve band. I ended up using the cuff for his shirt, but I plan on making use of the sleeve bands I cut out, but only for a short sleeve shirt.

The pattern says you can stabilize the shoulders either with interfacing or the fabric but just cut it on the grain and not the stretch. It makes the shoulders more sturdy, thus "stabilize".


I used a straight stitch and then where you see the 3 on my machine I used for the overlocking. I don't have a serger so I used that stitch because it was for stretch fabric. You can barely see it, but it did a good as a overlock, but I changed it to the 3-zigzag stitch and adjusted the width.

I used the 3-step zigzag stitch for the rest of the shirt.

The shirt is practically finished, but I'm going to add the graphic.
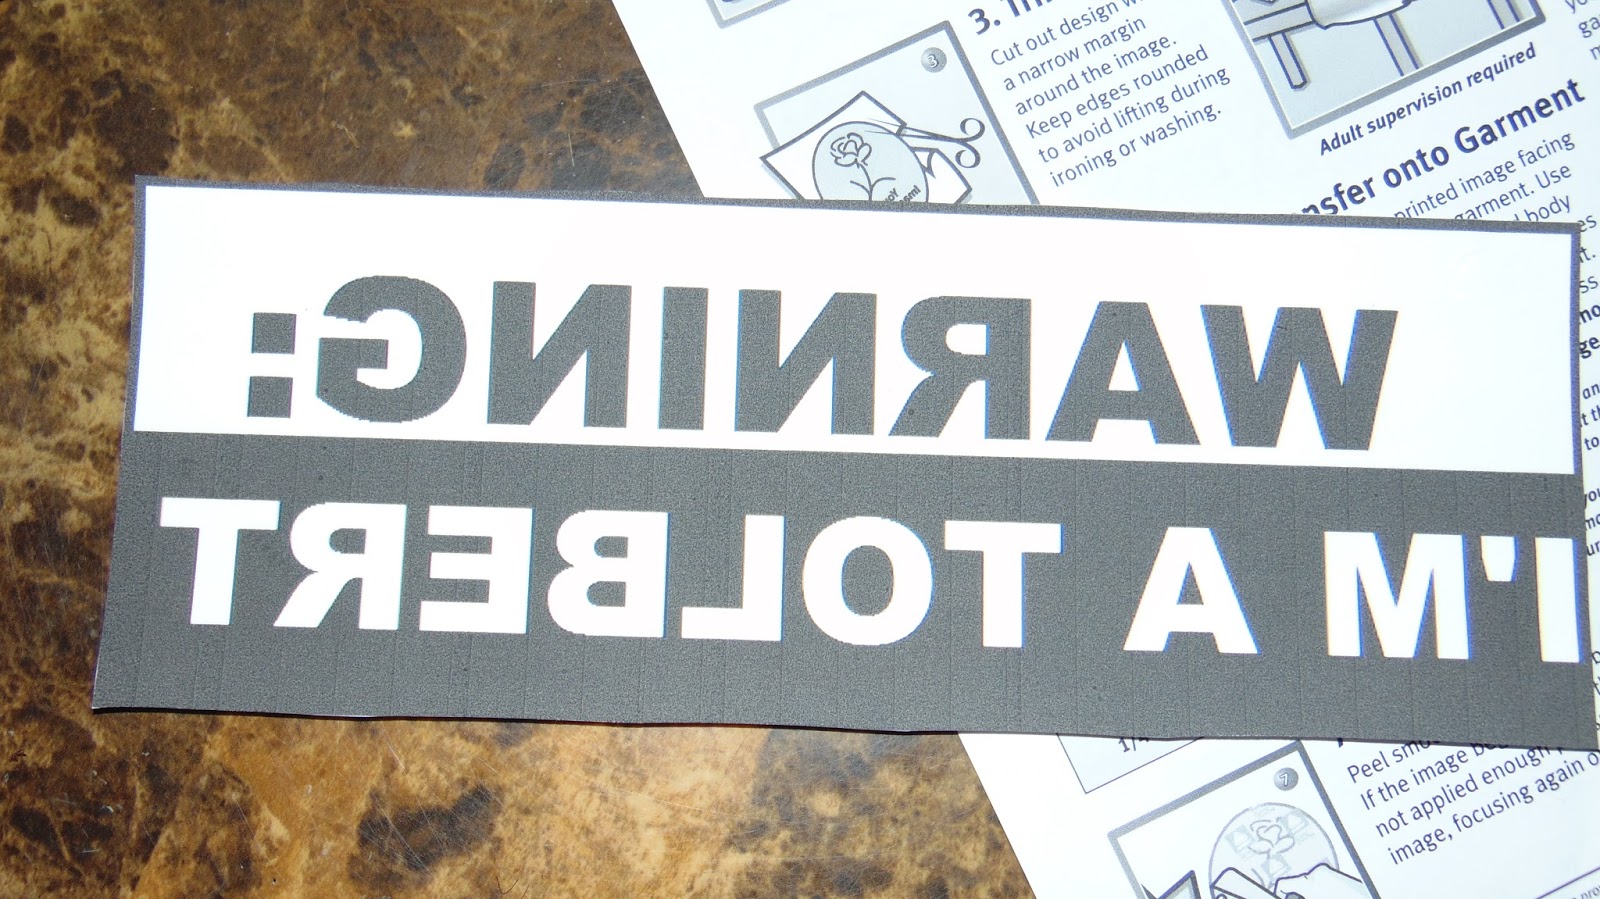
Now, to make the graphic I used paint on my computer because for some reason my subscription to Word was acting crazy and I couldn't type anything on there, but now it is fixed, yay! When you make the graphic make sure you flip the image so the letters will be backwards BECAUSE if you don't the letters will be wrong once you apply the print to the shirt and you will have to start over and AIN'T NOBODY GOT TIME FOR THAT! I was inspired by a shirt that said "Warning: I'm Two", but since Carter will be turning 3 in May I dumped that and just changed it to "I'M A TOLBERT", which is our last name. Now my family wants family reunion shirts like this lol that's a lot of sewing, but I'm up for it.


Here is the finished garment for my toddler. I wish I could have pictures of him in it for you guys, but he acts a little cranky so maybe I will sneak a picture and post it on my Instagram. See you guys on my next post :)


2 comments
Thanks for sharing the great info.
ReplyDeleteYou can find huge Variety of graphics t shirts online at affordable Price.
Shop t-shirts online for a party, college wear, casual outing or a first date, Shop for funky and fashionable cool t-shirts, Graphics T-Shirts Online India, Best T-Shirts Online in India,Buy T-Shirts Online at affordable prices with Poofed & Free shipping. Refer & win Rs 50!If You have further queries about product or services without any hassle visit website.
ReplyDeleteThank you for leaving a comment!